Friday, February 29, 2008

"Lasting Elegance"

"Lasting Elegance"
© David A. Ziser

This image was taken from the same wedding I featured an image from yesterday. It is one from the series I did after the wedding mass. After about 20 minutes of group photographs, I like to release the crowds and work with the bride and groom for about 8 - 10 more minutes. It's in this time period that I try to get about 5 dramatic images for their wedding album. This was one of those images. The direction of light was created with my off-camera Quantum flash firing through an umbrella while "dragging" the shutter. Dragging means using a slower shutter speed to pick up some of the ambient light. Camera specs; Canon 5D fitted with Sigma 12-24mm lens at 24mm, F6.3 @ 1/15 second, ISO 640. Enjoy! --David

Fabulous Inspiration Friday

Good Afternoon Everybody,
Whew! We are hopping around here today. LaDawn and I heading up to the Professional Photographers of Ohio / Mid- East Regional Convention this afternoon. I'm excited to be having dinner with my buddy, David Jay, this evening and then hitting the trade show tomorrow. I'll give a show recap next week. And speaking of next week, I'll be reporting from sunny, warm Manzanillo, Mexico. Heck, relaxing down there, I might not get the posts up till early evening - just kidding. We've got to get scootin' as we've got places to go and people to see - so on with "Fabulous Inspiration Friday"...

Best Baby Photographer In the World Featured on CNN

This is a great 6 minute piece on the world renowned Anne Geddes. It's a nice peek into the creative thinking of a great photographer. Worth the "watch" right here.

Speaking of Mexico, I Found These Ten Tips For Travel Photography

Here are the quick bullet points from a really good piece by Andrew Gibson over at JPG Magazine.
  1. Go somewhere amazing - like Mexico.


  2. Go somewhere ordinary - like your home town, maybe.


  3. Shoot the people, especially if you're somewhere exotic.


  4. Don't shoot the people, especially if you or they are uncomfortable.


  5. Take photos of the kids - most of them will "ham it up" for you.


  6. Research, research, research - hit the Internet before you go and see what's cool to see after you get there.


  7. Search for magical light and I don't mean between 10a.m. - 5 p.m. It really gets pretty before 8a.m. and after 6 p.m.


  8. Be alert for opportunity - maybe you can buddy up with a fellow traveler.


  9. Look for inspiration sunsets, sunrises, close ups, colors, shapes, etc.


  10. Never be satisfied - you always want to do do better.

Here is the complete article right here. It's a nice read.

Some Really Cool Color Digital Art To Get The Brain Juices Flowing

Just looking at some of these works - all Photoshop manipulations, takes your breath away. It's amazing to see what the makers have envisioned then created with these images. Here the link to thumbnails right here. Or better yet, watch the slide show right here - it's a great jolt of inspiration!

A Fascinating View Of the World With Time Lapse Photography

Sometimes things just strike me as really fascinating to watch - Time Lapse photography is one of these things. Maybe it goes back to my days watching the Disney nature specials watching the flowers open up at the beginning of the day. Or, maybe watching the PBS series "The Planet Earth" that keeps me intrigued.

Anyway, here are two of my favorites - I hope you enjoy them too. By the way, scroll down for a few more YouTube links with some very cool time lapse videos you can watch over the weekend. Exotic Places--


Mount Tamalpais--


More cool time lapse videos--
Golden Gate Bridge - very cool.
Vienna, Austria - just beautiful.
A Year On Arctic Ice - mesmerizing.
Being Pregnant - really intriguing.

So are you hooked and now want to give it a try yourself? Check out these video tutorials on just how these amazing videos are created. Here is the first video right here and here is the second right here. Enjoy.

Hey gang, we are heading out the door in just minutes, so I'll visit with everyone from Mexico next week. Adios, --David

Thursday, February 28, 2008

"View From The Front"

"View From The Front"
© David A. Ziser

This image was made at the St. Mary's Cathedral Basilica in Covington, Kentucky. It is one of the most beautiful sanctuaries in the region. I always check beforehand with the priest asking permission to take a few shots from this location - it's never been a problem but it's a simple, courteous question to ask. From this location, with a very wide lens on my camera, we can capture and unbelievably dramatic view of the architecture. Camera specs; Canon 5D fitted with Sigma 12-24mm lens at 12mm, F4.5 @ 1/30 second, ISO 1600. Enjoy! --David

Bountiful Business Day Thursday

Good Morning Everybody,
So how did you enjoy Oldie But Goodie Day yesterday? Next week I'll concentrate on wedding images - I'm going through the old files as we speak - so to speak. But, hey, today is "Business Day Thursday" and I think I've got some solid tips for you today, so let's get right to it.

Hey, I Don't Need The Money - Then Don't Read...

7 Ways To Increase Sales right here over at HubPages. I just re-read this article and love it for it's simplicity and practicality - it is a good one. I've been using most of these ideas very successfully for years. Get your plan together and get these ideas working for you.

A Little Planning Goes A Long Way - 9 Things To Nail Down Before The Wedding Day

Here we go - read on...
  1. Verify all times and locations. Be sure nothing has changed or been updated without your knowledge.

  2. Verify the "dress code" for the event. For us, it is always dark suit, tie, white shirt, dress shoes. If the event is "black tie", then dust off the tux and get you assistants in black suits and a bow tie in lieu of renting a tux. Female assistants are always in black dresses or black suits.

  3. Be sure your assistants are scheduled and know the dress code. Have them plan to meet with you at your home/studio about 45 minutes before you leave for the event to review the day's agenda, shoot routine, names, and the team's responsibilities.

  4. Walk through the day with the client discussing when you will be arriving on site and the images you will taking of the girls and of the guys. Also discuss the images you plan to capture as they head for the church, the guests' arrivals, candids of the activity before the ceremony and unobtrusive ceremony images (all without flash). Assure the bride that the length of the group pictures after the ceremony - if they are not done before - will only be 30 minutes (or less if she requests it.) 30 minutes is our upper limit for these shots. Let the client know that you will have great coverage of the ballroom well documented with several overall views and several detail shots as well. If it's a smaller wedding, you can still capture the details and special touches that make it special for the client. Make it look better than it was! Lastly, let the client know you will capture all the fun, excitement, action, and spontaneity of the party. Keep all events well documented. We personally never leave till the end of the party. This conversation with the bride instills in them a level of confidence in your expertise, experience, and professionalism. It also builds the expectation that everything will be covered thoroughly and beautifully on her wedding day.

  5. Review with the client your "image review" policies and procedures so there are not any misunderstandings or miscommunication about them. We have the wedding images on-line about 30 days after the event, let them select their favorites, and fine tune the selection at a meeting in our studio about a week later.

  6. Follow up with wedding consultant/hotel staff/family coordinator for final review. Get all the "bases" covered. They will feel more comfortable with you having made the effort to be thorough and you will be more confident in knowing you are fulling informed from all sides.

  7. Double check rules and regulations at the church/synagogue if you have not worked there. Sometimes a phone call to the priest, minister, or rabbi to check on policy can be helpful. If you do this, you will probably be the only photographer in your local ever to make such an effort and the priest, minister, or rabbi will remember and appreciate your effort and professionalism.

  8. Be sure to talk, phone, or even meet the groom if you have not before the wedding. This avoids the "jerk groom" syndrome. You show up for the pictures, the groom has never met you, takes a little "attitude" with you because you've got to do your job and get the pictures, and starts acting like a jerk. Hey, it's your fault. Start building your relationship with the groom before hand. That way when you arrive on the scene, he respects and likes you and the whole session goes much more smoothly.

  9. Lastly, remember it's the couples day on their wedding day! This is not your opportunity to make it a picture fest for yourself and the bride and groom are your models for the day.

We cover all of this in phones calls to all the contacts listed here. If a client is coming in from out of town and wants a personal visit - no problem. We are always available to our clients by phone or in person to assure a smooth flowing day for their event. Thanks to Rob Jones, one of my DigitalProTalk readers, for suggesting this topic for discussion.

One More "Have You..."

Have you thanked one of your employees for a small act of helpfulness …during the week? You know, my studio is pretty much like so many other busy studios - we get so wrapped up in the day-to-day activities, crises, phone calls, interruptions, etc., that we can forget about the most important aspects of our studio's success - the people. Just make it a point to thank an employee for a small act of helpfulness, or a job well done today.

A few seconds out of the day showing a little appreciation to an employee goes a long way in building loyalty and helps maintain a healthy and positive employee attitude as we navigate the occasional "pot-holes" of a business week. Thankfully, I have this outlined in my blog notes each week so it reminds me to take my own advice. Our plan is to post our favorite "Have You's ..." in the production area so we can all take note of it and be responsive to their importance.

More Possibilities For Higher Sales

There are a million sales solutions available for the portrait/wedding photographers. One of my favorites - MPIX has a "ton" of valuable ideas. I have been friends with the company for many years. Pricing and service cannot be beat. Check out all the MPIX pricing and sales solutions right here.

I was cruising over at Shutterfly ProGallery right here. They have some very good ideas that may work for some of the new budding wedding photographers. They make selling your pictures easy and offer several other options for photo gifts, too.
Lastly, Pictage, one of my Digital WakeUp Call tour sponsors offers a different mix of sales options for you. You can get all the Pictage info right here. Check all three out and see if there is a good fit there - they are all well respected vendors.

On that note folks, I'm heading out of here. LaDawn and I are heading to the Ohio regional photography convention in Dayton, Ohio this Friday and Saturday. I look forward to bumping into my buddy David Jay, and see what he has been up to lately.

Also, the convention has a great trade show, so we'll catch up with several of our vendor buddies, too. I'll give you the re-cap next week. I've got some cools things for tomorrow's post so I'll see you then - have a good one. --David

Wednesday, February 27, 2008

"The Violinist"
© David A. Ziser

This image was photographed around 1968 while I was still in college. See "The Budding Photographer" story below. I did do a bit of post production work in Photoshop, mostly tweaking the vignetting and adding the grain - excuse me - noise. Camera specs; to the best of my recollection - Mamiya Sekor rangefinder camera with 50mm F2 lens, Tri-X 400 B&W film push processed to ISO 800. By the way, ISO was ASA back in the day. Enjoy! --David

Oldie But Goldie Wednesday

Good Afternoon Everybody,
Sorry about the late post again yesterday. I was pulling my hair out trying to get the video finished. But a call to Tech Smith's Camtasia support and selecting a different preference setting finally solved the video problem - about 2 hours later.

Anyway here we are on our Oldie - Goldie Wednesday. As promised, I going to board the "Ziser Way Back" machine and show you some of my first images - ever.

First a little history - my interest in photography started quite by accident when, at about age 13, I discovered some of my dad's early manuals for processing film and images. He even had some small 5x7 trays and the ruby red safelight. Yes, he was a hobbyist back in the 40's and now that interest was passing on to the next generation.
My friend, Russ (he is still one of my best friends even today) and I headed down to the local camera store and purchased our first quart of Kodak Dektol developer and a quart of Kodak fixer - we were ready to go. We grabbed some of my parents' negatives. They were really big back then - about 2 1/4" x 3 1/4" - being from 120/620 film format format used by their ever popular Brownie Hawkeye camera. I can still remember that first image coming up in the developer under the deep red glow of the safelight - what a kick - I was hooked!

The Really Early Training

I started high school the next year and now I had access to all the photo books in the library - which wasn't a big selection, but a start. My all time favorite was by Andreas Feninger entitled, "The Complete Photographer." I think I read it from cover to cover at least 5 times.

This was also about the time I started taking pictures, too. I remember finding one of my dad's old folding cameras, buying some film, taking the photos, and processing and printing them myself. The bug had definitely bit. I even started experimenting with "hot lights" (high output photoflood bulbs in inexpensive reflectors) portrait photography.
Here is my first attempt at a portrait taken around 1962. It's an image of my next door neighbor's young daughter. I used a bed sheet as a background. The lighting was a photoflood in a reflector supplying the accent light for the back with a less bright photoflood in a reflector giving me the light from the front. I know it's not perfect, but, hey, I still caught the baby's great expression. I believe, not a bad first effort for a 14 year old. I think I sold it for about $10. Big bucks back then. The entrepreneurial spirit was just budding.
I even bought my first real camera in 1964 - the Mamiya Super Deluxe rangefinder model. I paid a whopping $52.53 for the camera. My parents thought I was crazy to spend that kind of money.....especially on a camera.

The second image is post Photoshop. I know what you are thinking - "Hold on one minute, Ziser - that's cheating." Well, not really, remember, back in the good old days, we used real darkroom techniques called "burning and dodging" to get the print densities where we wanted them. Where do you think Adobe came up with those terms?

A year later, at age 15, I shot my first wedding. I was the proverbial friend of a friend shooting the job. A friend of my dad's at work had a daughter getting married and I got the job. My first medium format camera was a Yashica A. I was off and running!!

The Budding Photographer

After high school, I moved on towards college planning to get a chemistry degree. Because of the long lines for chemistry and due to a friend's coercion, I changed majors at the last minute and joined the Physics department. Yep, I have a degree in Physics, Industrial Engineering, and a minor in Math and Computer Science. If you've not figured it out already - I was a really "geeky" kid back in those early days.
All through college, I worked as a photographer. That job paid the rent, bought the books, and in general got me through school. Here is an image I made during a violin recital. The image was made on Kodak Tri-X ISO 400 film and "push processed" to about 800 ISO. I picked up quite a bit of contrast, but I still love the image to this day.

The second image from that I shoot is posted today as the "Image of the Day" above. I added a little noise, via Photoshop, for added effect. These images were made around 1968 - I was 20 years old at the time.

Fast Forward To 1975

The Cincinnati Reds had just won the 1975 World Series!! For all you baseball fans out there, this was the era of the "Big Red Machine" - Johnny Bench, Pete Rose, May, Perez, Joe Morgan, just to name a few. I was down on Fountain Square celebrating the victory with about a million other fans.
Of course I had my camera in hand and I shot this image. It too is still one of my early favorites. It was also one of my first published images winning one of the top awards in a local photography contest held by the Cincinnati Arts Consortium that same year.

OK, So How About An "Oldie But Goodie" Wedding Image

I was looking for some really old wedding images to post. I'll have more next week - but I did come up with this image. This is actually a copy from an old Polaroid print (remember you can't buy Polaroid film anymore.) I made this image about 28 years ago. It epitomizes the style of some of the images of the day.

I used a Curtis Matte Box which was a hot piece of equipment for the wedding photographer back in the 1980's. It was a black box fitted with a close up lens and attached to you medium format camera. It came supplied with a series of 21/4" x 2 1/4" glass mounted transparencies like the brandy snifter in this photo. First you took the photo of the brandy snifter, or a heart or star..... then double exposed the image of the bride and groom into the glass. It certainly was a lot more involved than Photoshop, but it still worked. If you are interested in even more of this exciting imagery, here is a link to an entire discussion thread on the subject over at photo.net right here.

Hey gang, that's it for today's "Oldies" post. Hope you enjoyed it. Please, be gentle with the comments, too - I'm baring my soul here, you know. I just pulled some images out of storage from 1979 - check back next week to see what I find.
Have a great one, David

Tuesday, February 26, 2008

"Looking Up 2"

"Looking Up 2"
© David A. Ziser

I made this image while photographing a wedding in early January of this year. Before the guests come into the ballroom I rush through the space shooting about everything I see and from about every angle. As I only have about 7 minutes to get the shots, it is quite a rush, but my clients love the results as does the venue. Camera specs; Canon 40D fitted with 10-22mm lens set to 14mm, F4 @ 1/20 second, ISO 1600. Enjoy! --David

Technique Tuesday 02.26.08

Good Morning Everybody,
Well, here we are again with another Technique Tuesday. Today's tutorial is on wedding photography. I think you will enjoy the lesson. Check out the rest of the posts as well - good stuff on lighting, Lightroom, and Photoshop. So, off we go with Technique Tuesday...

Technique Tuesday - "The Icing On The Cake"

Sounds simple enough, doesn't it? Shoot a cake, shoot the bride and groom cutting the cake and it's covered right? Wrong! Good wedding photography is about being thorough, it's about capturing what others miss, it's about seeing with the eye of a storyteller.

Watch the video below and I'll walk you through what I try to capture for my clients on their wedding day. I'll wrap the video also showing the final page layout in the client's wedding album. Cool stuff - give a peek below. Enjoy!

Getting the Light Just Right Indoors

Young kids portraits are not the easiest to photograph. Those little ones can be playful, scared, apprehensive, impatient or full of energy etc. Here in an article right here complete with 34 illustrations on how to enhance the lighting in your home and augmenting it with additional strobes when photographing children. The photographer, Ben, even discusses how he captures the final expression of his son, Aide. The finished image may not hang in the National Portrait Gallery, but Ben gives some good incite into the entire process.

The Two Best Colors In The World - Black and White

They always say there is more than one way to do something in Photoshop. Well, here is a real treasure of an article on B&W conversions right here by P.J. Morley. Mr. Morley shows, count them, four ways to convert your color image to black and white with a thorough explanation for each procedure. Of particular note is the Channel mixer technique. He gives several settings for emulating the tonalities of several B&W films.
For quick reference, here are the settings.
Fuji NeopanR +45, G +30, B +25
Ilford DeltaR +25, G +40, B +35
Ilford HP5R +47, G +47, B +6
Kodak Tri XR +35,G +28, B +37
Kodak T MaxR +30, G +32, B +38

But wait, there's more, and they are even more interesting.

These are the settings for creating an "Infra-Red" effect. Again, here are P.J.'s Channel Mixer settings:
Try these as a starting point. Note these don’t all add up to 100
IR Effect 1R +50, G +65, B -30
IR Effect 2R +80, G +100, B -100
IR Effect 3R +60, G +80, B -80
IR Effect 4R +70, G +40, B -50.
If you prefer a darker sky give a little tweak in curves to boost the contrast.

It's a great B&W article, check it out here.

Are You A Lightroom Guru Yet?

I have posted so many links to Lightroom tutorials here, if you watched half of them, you would be giving Matt Kloskowski a run for the money in the expert department.

Well, wait there's more. John Nack just recently posted several other articles on his blog. Here is the link right here. Check out my article entitled, "Another Peek Into My Friday Program - LightRoom for all my links. you will find about a gazillion of them.

By the way, don't forget to check out Matt's new book on Photoshop Layers right here - it's a killer!! Hey gang I'm off - another busy studio day today - so I'll see everyone tomorrow for a peek back in time at some of my earliest photographic images. See you then, --David

Monday, February 25, 2008

"The Icing On the Cake"

"The Icing On the Cake"
© David A. Ziser

I photographed this image last year at a beautiful wedding held at my favorite venue, the Netherland Hilton hotel in Cincinnati, Ohio. The guests had not yet entered the room and I was able to get this really dramatic wide angle shot of the cake. Camera specs; Canon 5D fitted with Sigma 12-24mm wide angle lens at 12mm, F5.6 @ 1/15 second hand held, ISO 1600. Enjoy! -David

Thoroughly Marvelous Monday

Good Morning Everybody,
After 6 months of blogging, I think DigitalProTalk is starting to hit it's stride. I wanted to share with you my plans for how the blog is shaping up and getting organized. Let me explain;

  • Monday will be an Open post day with any posts pertinent to photography falling into Monday's line up.

  • Tuesday, of course will be Technique Tuesday featuring tutorials on lighting, photography, Photoshop, Lightroom, etc.

  • Wednesday has morphed into "As The Photo World Turns Wednesday." I got the "Oldies But Goldies " series starting this week for 12 weeks - so you get the idea.

  • Thursday is shaping up nicely as B(Business) Day Thursday and is becoming one of my favorite days to post. I love this business, sales, marketing tips and information.

  • Friday will continue to be "Inspiration Friday" and feature photo stories on creativity and the creative process, photography, and design. It's about getting your "brain juices" flowing.
That should be a pretty darn good week of diversified posts that helps us all stay informed and excited about our art, our craft, and our profession. So spread the word, stay involved with your comments, make suggestions, and post to the DigitalProTalk Flickr site.

Hey gang, we are off to a good start today. I've got a few cool stories lined up for today, got a brand new Technique Tuesday - "How To Shoot The Wedding Cake" about ready to go for tomorrow, and peeked at a few negs from Ziser's Oldie but Goldie Files for Wednesday, so the week is shaping up like a really great one. I hope you will stick around. Anyway, off we go...

Did You Hear - Polaroid Isn't Making Polaroid Anymore!


sunflower sx-70 poloroid
Originally uploaded by gsd_dame

I remember all those Polaroid cameras of years past and still own a number of them, so I guess it is a sad daywhen the old stops existing. You can read the story here at Engadget. But, I hear they still have stocked supplies that should last into 2009. You say, "So what?" Here's, what!! There has been a very popular fine art technique popularized over the several years by a number of photographers that enjoyed what was called "Polaroid manipulation."

Take a look at the very cool images over at this Flickr link. The resulting image looks a little like a Van Gogh image. I always thought the final results looked really cool, original and very interesting. Polaroid has the process described on their site right here. Ah, heck, I guess there is a way to do it in Photoshop. If anybody finds a way, let me know.

Losing Your Memory These Days ?

Too many programs open and running on your computer has got it running at a snail's pace? Well, here is how to fix it. I have to admit, I almost didn't run this story. I'm thinking, "What does this have to do with photography?" Then I think of my own situation - too many things running on my Duo Core Dell 3 gig machine with 2 gig of memory - really slows me down.

This "for geeks only" article over at Lifehacker right here may be just what you are looking for if you are in the "same boat" as me. It shows how to reclaim the memory that your computer is hogging. Check it out, it will help speed up your machine.

Frozen In Action


frozen in action
Originally uploaded by ShhPeKo
We had that same thing happen here in Cincy this past weekend. It was sooo cold, the guests brought the frozen bride and groom in from outside and just danced around them till they defrosted and could move again. It seems their photographer took way too much time posing their pictures on this wintry weekend and it took them about an hour to defrost ;~)

OK, all joking aside - found this image over at DigitalPhotographySchool and I LOVE this image. I can't wait to try it on my next wedding. I'm going to park my assistant on the dance floor with my radio controlled flash, have him get the get the couple's attention, and shoot away. This image is creative and different - high fives to Brad Ross, the photographer. Check out Brad's web site right here.

21 Tips For The Aspiring and Seasoned Wedding Photographer...

...Over at the DigitalPhotographySchool right here. This is actually a pretty good set of tips for anybody out there shooting weddings. The article is thorough and well illustrated with some great images. It is well worth the read.

Hey gang, that's it for today. We have a busy schedule at the studio today so I'm off. See you tomorrow for Technique Tuesday - "How To Shoot The Wedding Cake." Adios, -David

Friday, February 22, 2008

"Pacific Beauty"

"Pacific Beauty"
© David A. Ziser

I made this image while teaching at the Golden Gate School workshop about 1988 - so only 20 years ago - practically yesterday. I think it is a beautiful image. My Hasselblad was fitted with a 30mm Distagon Fisheye lens . FYI...those things cost $6000 then and $7400 now - if you can even find it. So, how did I avoid the fisheye distortion - by keeping the horizon line "dead center" on the horizontal plane and the subjects near the middle of the scene. Back-lighting was created with a Lumadyne flash fired remotely with a radio slave - probably a DynaLite at the time. If you look closely, you may recognize Suzette Allen, as the bride. Suzette is one of the finest Photoshop teachers teaching today. Camera specs to the best of my recollection; Hasselblad fitted with 30mm Distagon fisheye lens, F8 @ 1/500 second, Koday Vericolor 400 film. Enjoy! -David

A Fabulous, Fabulous Friday

Good Morning Gang,
Everybody ready for the weekend? It's our last weekend off before we hit the road for conventions, a bit of travel and gear up for early spring weddings. So things will be a lot busier around here in the next few weeks. I'll keep you posted as to what's happening.

Hey, a quick thanks to Mr. Scott Kelby for his very nice mention about DigitalProTalk in his Wednesday News Notes right here. Also, thanks to our blogging buddy all stars over at 1001 Noisy Cameras and ImagingInsider for keeping us in their sights.

As I mentioned before, I like Fridays to be about inspiring, creative photography, and photographic processes. It's not necessarily wedding imagery, although the image of the day is usually wedding related. The articles need to be a creative "turn-on " for our brain juices. I think I've got a good line up for today, so off we go...

A Master Portrait Artist Of the 20th Century

How about exploring some of the fantastic imagery from one of the most acclaimed photographers of the last century - Richard Avedon. Check out the Richard Avedon Foundation site right here. It is chalked full on striking imagery, articles, history, and biographical information about one of the finest photographers of the 20th century. A great place to visit and become inspired.

Modern Day Artist Uses 1850's Techniques

The images themselves give you the impression that you are taking a peek back into time - even though the actual photography was very recent. I first saw the story over at The Online Photographer. It discusses the work of Robb Kendrick , a photographer who works with the TinType process to create his images.

The original story appeared over at NPR Radio right here and is a fascinating look at Robb's projects and work. Here is a video clip right here of Robb himself telling about his 16 weeks and 41,000 mile trek across the country to make the project happen. This is truly a peek into an artist's mind.

It's Right Around the Corner - Worldwide Pinhole Photography Day - April 27, 2008

Pinhole photographers from around the world will participate in the next Worldwide Pinhole Photography Day. Hey, folks, this a big deal. I have always been fascinated with "pinhole photography" since I was a kid. No camera, no lens, make it yourself, only film was needed - a kind of nerdy kids dream project. I never got around to putting one together - although I am secretly working on my digital version. Wait til you see it - image stabilized pinhole, automatic bracketing, it's going to have it all ;~)

OK, all kidding aside, I ran an earlier post right here a few months back on "pinhole photography." It featured the amazing work of Roseanne Olsen. And just look at this gorgeous image from Cher McNeil below. Her beautiful Pinhole Gallery is right here.
Check out Edward Levinson artistry right here. Here is an example right here.

If you interested in this art form, let me point you to 43 links on "pinhole photography" right here. Take a look at the amazing galleries of 72 artists right here. And view the work of 459 more "pinhole photography artists" right here. And check out the gallery of images from the last 6 years - over 7000 images - from Worldwide Pinhole Photography Day right here.
It's a great creative Internet - cruise through these links. Enjoy!

The Wonderful Imagery of Andreas Messinger

I mentioned last week that I was involved with Brian Auer's FineArtPhotoBlog and what a "kick" it was to be involved with and get to know the other photographers included on this site. Today, I want to share with you the beautiful photography of Andreas Manessinger from Viena, Austria - check out Andreas site right here. Andreas shoots every day and posts his favorite image from the days' shoot. Once a day, everyday!! Talk about a commitment to the creative process - WOW! His blog is jammed pack with great info and worth several visits - give his work a peek.

Hey, gang, that it for this week. Have a great weekend, and I'll see ya' on Monday! -David

Thursday, February 21, 2008

"With This Ring"

"With This Ring"
© David A. Ziser

This image was part of a series I did for the bride and groom prior to the wedding. The bride and groom were really into photographs. That's great inspiration for we wedding photographers. It allowed meto have plenty of time for images at the house, the park, church, around town, etc. And, we got a great set of images for her wedding coverage. When doing the series for the couple, I love getting in close and just framing on portions of their faces, hands, rings, etc. To me, this truly captures the feelings between the two of them. Camera specs; Nikon D1x fitted with 80-200 F2.8 lens at 170mm, F3.5 @ 1/320 second, ISO 500. Enjoy! -David

It's B(Business) Day Thursday All Day Today

Good Afternoon Everybody,
Well, we are getting back on schedule today - and I got lots of good information to cover. We had some good suggestions on how to revive past customers, so check the suggestions out below. I'm going to cover one more "Have You" today, and the regular line up of good business info. So on with Business Day Thursday...

First Off - "Have You..."

...Visited a customer in the last 10 days? I really try to make an effort to accomplish this. If I'm going to be on the other side of town on business, or running an errand, I tie that together with a delivery to a client in the same area. Always try to tie the deliveries with your regular studio errands. The clients love the personal touch.

This past Saturday, we were on the way to dinner with friends north of Cincinnati. On the way we dropped something left at the studio off for one client, visited another client's home to measure some wall space and discuss frames and sizes, and then ran into another client - not literally - as we were driving out of the neighborhood. We had a nice unexpected visit with them about an upcoming event we are doing for them in May. So, all in all, it was a excellent client connect day. It goes without saying that the three clients we visited as we headed north have been wonderful clients as we have photographed a total of nine events/family portraits with them. I believe the policy speaks for itself. So go visiting!!

CPR For The Old Client List Or Resurrecting the Dead

After my Monday post, "Calling For All Good Ideas," I got a few pretty good ideas from some of our readers listed as follows:

1. My idea was to have a "Thinking Of You" promotion. You can read about it in my Monday post right here.

2. Jeff Schaefer suggested calling some of your lost clients and find out why they left. It could just have been a lack of communication. If they bring up specific problems address them. Focus on these changes in a marketing campaign. Then, continue the communicate with print and/or email newsletters and a blog.

On that note, I think a lot of business owners are afraid to know how their clients feel about them and want to stay away from a customer survey. It can be a great awakening to take the pulse of your customer preferences and expectations.

3. Kay from Germany had some really good suggestions too. Here they are; A. Do an exhibit with some of your latest works and invite all of your clients. B. Send seasonal greeting cards to your customers. Not just any old seasonal card, but one you have created yourself. You can also recreate some old masterpieces or movie scenes with images of yourself and your staff. These are very recognizable and will help your clients keep you in mind. C. Give your nearly lost clients a discount on copies of the pictures you have done on the last shoot. I think these are all good ideas. It's about reconnecting and then continuing that relationship.

4. One person suggested "Free Stuff" - Prints on canvas, brag books, and extra CD's and DVD's. "When I tell the client that I want to give them a canvas print that would normally sell for $250 for FREE, it brings them back every time. My canvas printer gives me a substantial discount when I order dupes, so if I'm careful about how I'm ordering it (i.e. one for a studio sample and one to give away), it doesn't cost me much more than what I was going to spend for promotions anyway. I'm saving customers money and thus gaining customers at the same time! "

5. Here is one for the road that I came across yesterday, and it's one of my favorites. What I like about it is that it works great for present and past clients. April Cullet at Studio Gagliano, Inc. has an "After Hours" cocktail party for their clients to bring them up to speed on the studio happenings. Here's is the link to here blog post on the subject. This could be a perfect opportunity to reconnect at a social gathering with those past clients you may have let slip by . An "After Hours" party to reintroduced them to your wonderful photography and services. Even if you don't have a studio, you could easily pull it off at one of the smaller hotels like a Hyatt Place, Hilton Garden Inn, Marriott Courtyard - any location with small meeting space that does not break the bank. We work with a small hotel where the charge is only $150 for the entire day room rental. I feel this is pretty reasonable expense for saving the mailing list.

Thanks to everyone who responded. I think we have some solid ideas here - now we need to act on them. Now read on to a quick recap of Jeff Gitomer's tidbits from his newsletter this week - perfect timing if you ask me.
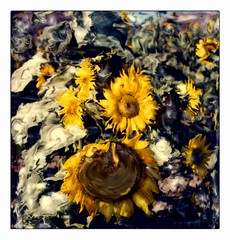
Lack Of Sales Is Not A Problem - Read On There's More

"Lack of sales is NOT a problem. People’s indecision is NOT a problem. Lack of motivation is NOT a problem. All three are SYMPTOMS. If you’re looking to cure your ills, you’d better look deeper than complaining." These are words from one of the top sales trainers in the market.

I get Jeff Gitomer's newsletter every week. I have purchased some of his sales books, and I really like his message. He focuses mostly on taking responsibility for your success, stop making excuses, and let's get the job done.
Here is a short excerpt from his last newsletter.

Here’s where to start – look for the clues:
  • CLUE ONE: Plan less. Act more.

  • CLUE TWO: Plan for today the night before.

  • CLUE THREE: Plan for the week on Sunday.

  • CLUE FOUR: Plan six valuable or money meetings.

  • CLUE FIVE: Plan actions and activities that lead to completion.

  • CLUE SIX: Plan successes, not just actions.

  • CLUE SIX POINT FIVE: Now is the time. You know the old expression, “There’s no time like the present.” I say, “There is only the present.”

Here is the rest of Jeff article right here. I think his kick in the pants attitude is good for all of us now and then.

Work Out Of Your Home - How To Keep Your Sanity!

Where do you draw the line? LaDawn an I have this same issue with our business. Some times too much business slips into our home life. We have a residential studio that is quite a busy place with staff, deliveries, phone calls, clients - the list goes on and on. How do you separate home from business? You have to draw your line in the sand for HOME and for BUSINESS.

Once that's done - don't cross it. Home time is for home and should be free of the constant pull of the business. Let an answering service get the phone, don't check the emails, don't continue to work on studio "stuff" during your non-studio time. Keep home and business separate. Look forward to the weekend if you don't have a "shoot." For the sake of your sanity don't fill that precious free time with another studio project that can wait until Monday.

Sure, we all get busy and sometimes the line blurs, but constantly strive to keep the boundaries clear in your home studio. Here is one of the best articles on the subject right here at ZenHabits.net with 30 Tips on doing just that.

Wednesday, February 20, 2008

"The Choirmaster"

"The Choirmaster"
© David A. Ziser

I made this image a number of years ago - probably in the mid '80's during a wedding ceremony. It's still a favorite. I headed to the balcony to get some overall views of the service and there was the boy's choir singing away. I put the 40mm - Hasselblad's widest angle lens - on my camera and started shooting away. The challenge was to keep as many as the choirboys in focus as possible - I was back as far as I could get and I had a lot of depth in the shot. I choose F5.6 as my aperture which necessitated me using a slower shutter speed like 1/8 second. I was shooting Kodak ISO 400 Vericolor - that was our high speed champion at the time. Color balance was a bit warm because of the "daylight" film being used in a mostly "tungsten" lighting situation, but I still thought it looked acceptable.

Anyway, I selected a focus point about 1/3 into the group - about 9 feet. At F5.6, I had focus from 6 1/2 feet to about 17 feet away - good enough for the shot. (See my article on calculating Depth of Field right here.) At my slow shutter speed and on a tripod, I knew I still needed to stop the action of the singers. My easy solution for this is to find a "pause point" in the action. A "pause point" is a moment of time when most motion pauses ever so slightly, for instance at the end of a sentence during the ring exchange. In this case, it was the "high note hold" of the song. The choirmaster held the baton in the air for a second to emulate the "high note" the singers also needed to hold. The 1/8 second exposure was just right to stop the action at that "high note pause point." The finished image was a favorite of the couple's too. Enjoy! -David.

Weird and Strange Wednesday

Good Morning Everybody,
What a day yesterday - It seemed everything went south at the same time - equipment, printing, phone calls, video capture for the blog - yes, I have days like that, too. That's the reason for the very late post yesterday.

I always think about a piece of advice I read years ago - how do you respond to interruptions? The advice was to consider all interruptions as "molding" interruptions. Don't respond with the typical "knee jerk" reaction, but pause for a moment and consider how to respond appropriately, responsibly, and kindly. What a challenge that was yesterday, but we made it and all is well and beautiful today with the snow falling as we are presented with our first real snow covered day of the new year.

Speaking of late posts, let me explain my posting routine. These last few weeks the posts have been falling into the "afternoon" category for one reason or another - yesterday was the exception. This has been working pretty well around here as I do the postings around the studio schedule - I do the writing and LaDawn does the proof read and posting. I like to give each days posts about a 24 hour life before posting again. That means one afternoon post usually set the tone for all the following week's posts. Normally I post around 12 - 2 p.m. Since yesterday's post was so late, I am posting today around 4 p. m. - it's that 24 hour thing. Thursday and Friday should fall back to my normal schedule posting around noon to 2 p. m. Anyway, now you know the rest of the story about my blog schedule.

Well, I'm calling today's postings "Weird and Strange" Wednesday. These stores are not an early "April Fools" joke - but real stories happening in our photo segment of the blogsphere. Here goes, are you ready?

Computer Viruses Rampant In Electronic Picture Frames

Here is the lead - "An insidious computer virus recently discovered on digital photo frames has been identified as a powerful new Trojan Horse from China that collects passwords for online games - and it's designers might have larger targets in mind." Can you believe it - viruses in those electronic picture frames. I thought is was a hoax till I read, via Imaging Insider, the entire story over at the San Francisco Chronicle's website right here.


It sees most of the infected frames came from Sam's Club and Best Buy. New reports involve frames sold at Target and Costco also. This is the real deal, the story was also reported on over at the Seattle Post Intelligencer and the Washington Post. The Internet Storm Center has a list of more such items harboring malicious malware too right here. Very Weird!!!

Iris Recognition and Biometric Signatures Embed Into Your Photographs

Say what!!!??? Sounds pretty "1984" or "Brave New World" to to me. It seems that Canon has a new patent whereby their camera will actually take a retinal scan of your iris, and produce a biometric signature that the camera will then embed into the photographs, authenticating the images as yours, and aiding in locating who the person is that took the photograph via some form of steganography.

I think they see it as the ultimate copyright stamp on images. You can read the entire story right here over at Photo Business News and Forum. Very Weird!!!

Frozen In New York

On a cold Saturday in New York City, the world’s largest train station came to a sudden halt. Over 200 Improv Everywhere Agents froze in place at the exact same second for five minutes in the Main Concourse of Grand Central Station. This is a fascinating video to watch. Take a short break and enjoy the video below. Very Strange!!!

Want to see one more video where 200 actors don't freeze, but go into slow motion, head over to Improv Everywhere right here for the story and video. By the way, they have a few more "giggle" links over there, so when you've got a few minutes to waste, give them a peek. It's definitely something to do when productivity isn't the expectation for the day, but still fun and Very Weird!!!


Update On the Oldie But Goodies Photos

You wanted it so here is the plan. Next Wednesday, I'll start a 12 week series posting about 3 "blast from the past" images right here at DigitalProTalk. I'll do my best to give you the stories and exposure info behind the images as best as my weary mind is able to recall.

Hey, I figure it will be an interesting experience for all of us and should be fun and informative. So be sure to check back. Hey gang, it's shaping up to be a great day today. All appointments cancelled due to the snowy weather conditions- so I may just head out and snap a few pics of our Midwest winter wonderland. Have a good one and I see you tomorrow for B(business) Day Thursday. --David

Tuesday, February 19, 2008

"Sneaking A Peak"

"Sneaking A Peak"
© David A. Ziser

This image is a bit of a "blast from the past". Any time you see them come up square, it usually means an image from the film days. That's the case with this image, but it is still one of my favorites. I know I post a lot of dramatic pictorials, but 90-95% of the images I show the client are hopefully a great collection of spontaneous candid images - much like this one. Here is the story. The girls were lined up and ready to walk down the aisle on the cue from the bridal consultant. The doors were just opened for the processional to begin. The little flower girls wanted to see what was happening and both leaned at the same time to "take a peek." My Hasselblad was fitted with the 50mm Distagon lens. When I saw the girls lean over, I set the exposure quickly to get the shot. Even after all these years, the image still captures the spontaneous essence of the moment. Camera specs; Hasselblad fitted with 50mm Distagon lens, F4 @ 1/30 second, Vericolor 400 film. Enjoy! -David

Technique Tuesday 02.19.08

Good Late Afternoon everybody (especially those on the west coast),

Well, it 7:30 p.m. and the best laid plans fell victim to Murphy's Law today. A few small details kept the Technique Tuesday video from being completed till this late hour. But boy, is it a good one - tell your friends, tell your neighbors - it's not to be missed!!!!

Hey, all kidding aside, thanks to all who commented on the posts yesterday. Looks like I'm going to be spinning some oldies but goodies for your viewing pleasure. And NO, that's not one of my images to the right.

I'll get started on organizing them and come up with some type of plan to get them on line - ideas are a perking already. Many of them are still in albums so it involves copying them and spiffing them up a bit in Photoshop. Just for the record, I'll start with some really early images- how about from the seventies. Please, no "old" jokes, I can be soooo sensitive. So, what's up for today - well, of course - it's Technique Tuesday! So, off we go..

Technique Tuesday - On Camera Flash Used As An Off Camera Light Source - How To Tweak The Color

I've just developed this technique over the last several months. I love bouncing my on-camera flash off a wall or any other surface. I want those photons coming in from a decent direction to give me that beautiful direction of light I want on my images.

There are many times, though, when the surface the light is bounced from is not perfectly neutral thereby color shifting the light just a bit. Sure, it a fairly easy Photoshop fix, but I wanted to get it closer or correct in the camera. Watch the short video below to see how I solved my problem. Enjoy, -David

I Love To Be Put In A Polarizing Situation

Or why you should consider using a polarizing lens in some of the photography. This is something that most people know little about which is why I added it to the post today. Using a polarizing filter correctly can add dramatically to your the final result of your image - richer skies, clearer water, etc.

Check out the thorough and very well written
article over at Luminous-Landscape right here. It's a great read. GreatLandscapePhotography has another great article right here too. For just a quick peek on the subject, take a peek at the short article over at PhotoLearnings right here. And, if you have your PhD. in Physics and are a member of MENSA - this article on Polarization at Wikipedia right here will be right up your alley;~)